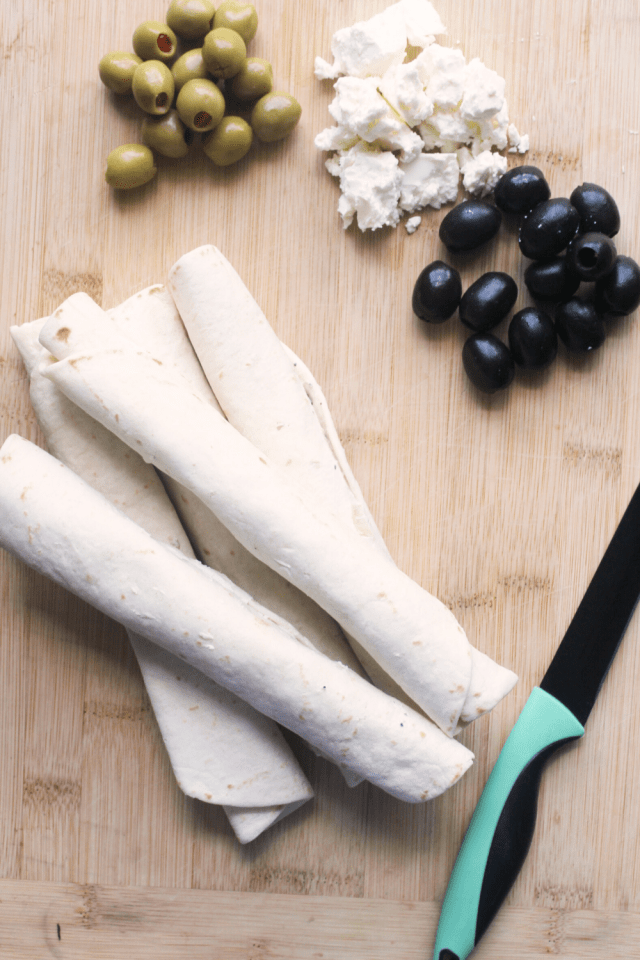
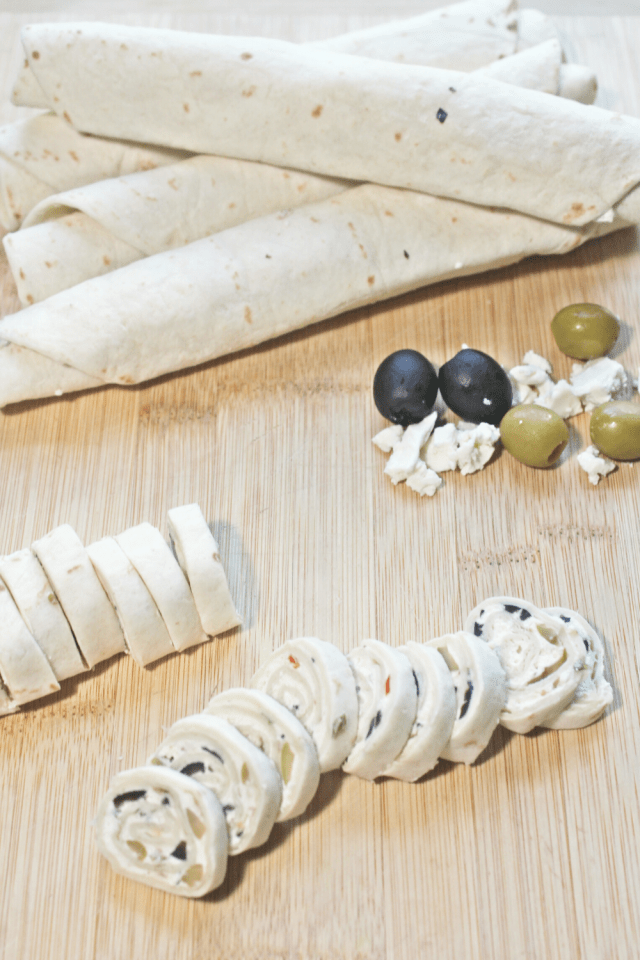
Finally, my Olive and Feta Pinwheels recipe is here! These pinwheels are packed with a flavorful cream cheese spread that features two different types of olives and Feta cheese! They are easy to assemble and they will wow your guests.
Pinwheel Goodness!
Everyone loves a good pinwheel, am I right? I’m a huge fan myself and I usually find myself gravitating to them at parties when I see them offered.
If you know me well (or at least know my recipes) you’ll already know that I have several pinwheel recipes in my Recipe Index.
But they are all the cooked versions that offer a low-carb take on those yummy ones made with crescent rolls.
If you haven’t seen those over the last 5 years, I highly recommend coming back to check these 4 out after you finish looking over these Olive and Feta Pinwheels.
- Warm Sausage and Cream Cheese Pinwheels
- Pepperoni Pizza Pinwheels
- Spinach and Feta Pinwheels
- Bacon, Onion, Ranch Pinwheels
All of these warm pinwheels are fantastic but I wanted to show some love to their cold counterparts and share my noncooked pinwheels with you today.
Olive and Feta Pinwheels
These Tortilla Pinwheels are addicting! I have made these several times now for my family and we all love them! I think you will also because they are simple and oh-so-delicious.
They are the perfect lunch and afternoon snack and they make a wonderful appetizer to take to parties and summer cookouts.
They will fly off the serving plate so if you’re feeding a huge crowd I recommend doubling this recipe.
You’ll find that this is such a versatile recipe and is easy to adapt.
You can choose to make one batch, choose to double it, or reduce it down to a half recipe if needed.
Here’s what You’ll Need:
- low carb tortillas or wraps
- ounces of softened cream cheese
- ounces of sour cream (
- chopped green olives
- chopped black olives
- Feta cheese crumbles
- chopped green onions
- Everything Bagel Seasoning
- garlic powder
Easy Recipe to Make Ahead!
I love how easy it is to make these Olive and Feat Pinweeks ahead. If you’re making these days the day of serving them, you’ll just want to chill the tortilla pinwheels for at least several hours before serving.
But if you’re like me and like to prep ahead, you can make them the night before or even several days ahead.
It really is a good idea to let them chill as long as possible. You’ll find that the flavor just keeps improving the longer they chill.
So maybe you’re a prepper and always cook things ahead or maybe you didn’t have time the day before to prep them, but either way, it is important to keep them rolled up and wrapped in plastic wrap or in a baggie at least a few hours before serving.
If you are traveling to a party or cookout I recommend leaving them rolled up for the drive over and taking your platter with you. Then when you arrive, you can simply slice and serve.
Oh and remember there is always a bonus in it for the cook. In this case, it will be the end pieces you slice off. You know those not-so-pretty, but oh so delicious, pieces you can munch on as you slice!
Tips and Tricks for Perfect Olive and Feta Pinwheels
I’m all about finding the best and easiest way to do recipes, especially if I’m trying a new one for the first time. So I always like to share tips with you guys when introducing a new recipe.
I want them to come out as perfect as possible for you when you make them. So here are my tips for this yummy appetizer recipe.
- Always start out with room-temperature cream cheese. This requires a little forethought about putting the cream cheese out on the countertop but doing so just adds to the ease of making this recipe. It will whip up so much smoother and quicker this way.
- For this lower-carb version, I use full-fat cream cheese and sour cream. But if you are looking to lower the fat content you could substitute them both for a 1/3 less fat cream cheese and either a lite sour cream or even a Greek yogurt if you prefer.
- Don’t overfill the tortillas when rolling them. I use a couple of healing tablespoons on each one. Then spread it evenly. If you put too much on the top as you roll the tortillas the filling will begin to come out the sides and this will ultimately reduce the filling that is in the roll-ups. Not to mention it makes a mess, ha!
- If you don’t like the thought of using a store-bought low-carb tortilla, you can substitute any low-carb wrap you prefer. I know there are some great recipes out there for keto and THM homemade wraps that would work great for these pinwheels.
- As you roll each tortilla try to roll them as tight as possible. This will not only make your presentation beautiful at serving time, but it also make the pinwheels easier to slice.
- Another great tip for “slice ability” is that you allow time for these rolls to chill for serval hours, or even better yet chill them overnight. Not chilling them for at least 2-3 hours will make them very hard to slice.
- Also, keep them rolled up and in plastic wrap or a ziplock baggie until ready to slice and serve. This will prevent them from drying out.
- The last tip….enjoy every last bite!

Olive and Feta Pinwheels
Soft low carb tortillas filled with a creamy olive and feat cream cheese. These Olive and Feta Pinwheels would make a great snack or appetizer at any party or cookout.
Ingredients
- 8 Mission Low Carb Tortillas
- 8 ounces of room temperature cream cheese
- 1/2 cup of sour cream
- 1/3 cup of Feta Cheese crumbles
- 1/3 cup of green olives, chopped
- 1/3 cup of black olives, chopped
- 2 Tablespoons of green onions, chopped
- 1 Tablespoon of Everything Bagel Seasoning (optional)
- 1/2 tsp of garlic powder
Instructions
- Place the softened cream cheese, sour cream, and Feta crumbles into a mixing bowl. Mix on low speed until well combined.
- After mixed add in the olives, green onions, and all spices. Mix slowly until all is incorporated.
- Next, law one of the low-carb tortillas on a plate and spread a couple of tablespoons of the olive mixture evenly over the tortilla. Be careful not to overfill as it will ooze out the sides as you begin to roll the tortilla.
- Continue filling and rolling the remaining 7 tortillas until all are complete.
- Then place the rolled tortillas into a gallon-size ziplock bag and place them in the refrigerator for at least 6 hours to set. The longer they are chilled the easier the pinwheels will be to slice. Tip: I prep my recipe the night before and then pull them out and slice them when I'm ready to serve.
- Slice each rolled tortilla into 8 to 10 slices.
Nutrition Information
Yield
19Serving Size
4 piecesAmount Per ServingCalories 123Total Fat 8.4gTrans Fat 0gCholesterol 16mgSodium 262mgCarbohydrates 8gNet Carbohydrates 4.5gFiber 3.5gSugar 1gProtein 4.7g
I am not a nutritionist. If you have strict dietary needs I always recommend using an online nutrition calculator to calculate your totals using your exact brands you're using in this recipe as values may vary per brand.
I am a southern girl through and through that loves to laugh, cook, read and spend time with family. My passions outside of home schooling my son are ministering to those in need and creating art in the kitchen! Every day is an adventure in our little house and I wouldn’t trade it or the chance to share here with you for anything!


I’ve wondered about using string to “slice” the pinwheels similar to the technique used for “slicing” pumpkin rolls. Have you tried it on pinwheels?
I haven’t tried that method of slicing them yet, but it might work. I’d love to hear if you try it and how it turns out.
Thanks For Sharing this amazing recipe. My family loved it. I will be sharing this recipe with my friends. Hope the will like it.